


Toyota Hilux 2005-2014 - Premium Head Unit Upgrade Kit: Radio Infotainment System with Wired & Wireless Apple CarPlay and Android Auto Compatibility


- Complete Kit: Screen, Fascia Kit, Plug & Play-Harness
- Processor Options: 4-Core (2/32GB) or 8-Core (4/64GB & 8/128GB)
- Vibrant Touchscreen: Crisp, responsive HD display
- Built-in GPS: Offline-capable navigation
- Adaptive Brightness: Auto-adjusts with headlights
- Complete System Replacement: Modern infotainment upgrade
- New Hardware Included: GPS antenna, microphone, all cables
- Plug & Play Design: Engineered for direct fitment with factory harness
- Installation: View installation requirements
- DIY Installation Design: Made for self-installation with our support team
- Professional Option: Partner installers in Gold Coast & Launceston, or find your local specialist
- USB Connectivity: 2 ports included (6-pin & 4-pin) View details
- 4G LTE SIM Slot: Mobile internet on the road (Premium 4GB/64GB+ models - enhanced connectivity)
- Smart Connections: Bluetooth, WiFi, USB
- Wireless CarPlay & Android Auto: Seamless smartphone pairing
- Voice Control: Siri & Google Voice supported
- Hi-Res Audio: DSP-optimized sound clarity
- Custom Equalizer: Audio tuning control
- RCA Outputs: For subwoofers and amplifiers
- Multimedia Streaming: YouTube, Spotify, Netflix & more
- Mirror Screen: Android & iPhone screen sharing
- Split Screen Mode: Use maps and media side-by-side
- Steering Wheel Buttons: Fully retained
- Hands-Free Calling: Mic & Bluetooth calling
- OTA Updates Ready: Future-proof software support
- 3-Year Warranty: Comprehensive protection included
- 30-Day Returns: Hassle-free return policy
- Live Support 7 Days: 10am–6pm, incl. holidays
- Brummstadt Guarantee: Trusted by thousands of Australian drivers

| Technical Specifications | |
|---|---|
| OS & Processor | Android 13 – Choose from 4-Core (2/32GB model) or 8-Core (4/64GB & 8/128GB models) processors |
| Memory & Storage | Up to 8GB RAM and 128GB SSD – ideal for fast performance and media storage |
| Display | 9″ IPS QLED – optimized for your dashboard |
| Audio & DSP | 32-Band Equalizer with built-in DSP – rich audio tuning for custom sound profiles |
| Amplifier & Touch | Toshiba Amplifier with IPS Anti-Glare 5-Touch Display – crystal-clear visuals with responsive controls |
| Connectivity | Supports CarPlay & Android Auto (wired & wireless), Bluetooth 5.0, WiFi, and GPS – seamless phone integration and live navigation. Premium models (4GB/64GB+) add 4G LTE for standalone internet connectivity |
| Radio & Inputs | FM radio, AM available via optional DAB+ receiver, RDS, DVR, TPS, CAM (Optional) – wide input support for all setups |
| Extra Features | Steering Wheel Control Support, plus split-screen for multitasking |
| In the Box | Head Unit, Fascia Kit, Harness Bundle, 2x USBs, and Antenna Plugs (FM, GPS), Antennas (GPS). Premium models (4GB/64GB+) also include: 4G antenna & SIM card holder for enhanced connectivity |
| Apps Supported | Netflix, Spotify, Apple Music, YouTube & more – enjoy your favorites right from the dashboard |
Compatible with the following vehicle models:
- Toyota™ Hilux from 2005-2014
Not sure if it fits? 📸 Send us a snap of your car and we’ll reply fast with what fits.
Please note that even vehicles of the same model may have subtle differences. We are committed to ensuring compatibility and have carefully accounted for each vehicle’s unique specifications. For assistance or inquiries, our expert support team is ready to guide you at every step.This product is not affiliated with or endorsed by Toyota™. All trademarks are the property of their respective owners and are used for reference only. Carefully crafted as a premium aftermarket solution, this product ensures seamless compatibility and reliable performance for this model.
Optional Accessories Installation Guides
Enhance your Brummstadt head unit with these premium accessories. Each accessory is designed for easy DIY installation.
External Microphone (Your Passengers Will Thank You)
Dead easy setup (honestly, 2 minutes):
- Connect to head unit: Find the 3.5mm MIC port in your wiring harness (it's with the RCA connectors). Just plug in the mic's 3.5mm connector until it clicks
- Pick your spot: Most people love the sun visor (clips on solid), but A-pillar or above the mirror work great too. The 3-meter coiled cable reaches anywhere
- Clip it on: The rotatable clip grips tight - sun visor, A-pillar trim, wherever works for you. About 30cm from your mouth is perfect
- Quick test: Call a mate and ask "How do I sound?" Prepare for compliments! Works brilliantly with Siri, Google Assistant, and hands-free calls
Pro tip: Mic too quiet? Head to Settings → Sound → Microphone Gain. Start at 50% (perfect for most cars). Noisy diesel? Try 70%. The difference is amazing!
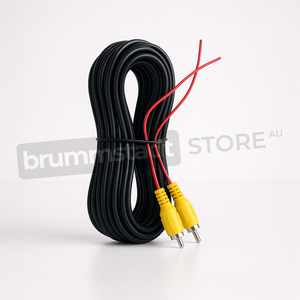
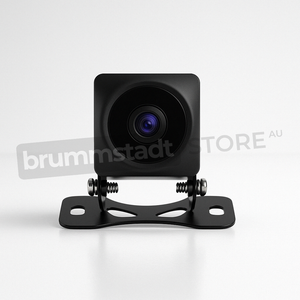
Rear View Camera Installation
For Brummstadt Cameras (Plug & Play):
- Mount camera above license plate using provided bracket
- Run the camera cable through rubber boot between car body and trunk/door
- Route cable under trim panels to head unit location
- Connect yellow RCA plug to CAM-IN on head unit
- Connect red power wire to reverse light positive (this serves as the power trigger that tells the head unit to automatically switch to camera view when you shift to reverse)
- Connect black wire to chassis ground
- In Factory Settings → Backcar Settings, set to "Aftermarket Camera"
Note: In most cases, connecting the red wire to the reverse light is necessary for automatic camera switching. However, in modern vehicles with CANBUS, this may not be required as the CANBUS module already controls screen switching (even if your car didn't come with a factory camera, the switching software is often pre-installed!))
Camera will automatically activate when reverse gear is selected.
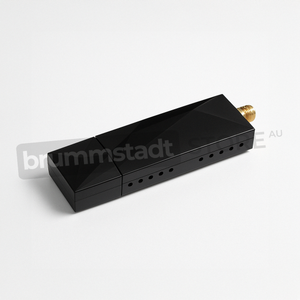
DAB+ Digital Radio Module
Installation Process:
- Connect USB module: Connect the DAB+ receiver to the USB 6-pin port on the back of the head unit (not the 4-pin port)
- Mount antenna:
- Clean windscreen area (top corner recommended)
- Stick the film antenna to the glass
- Route cable along windscreen edge under trim
- Connect antenna to module: SMB connector clicks into place
- Activate in head unit: Open DAB+ app and scan for stations
- Ground for better signal: Connect the DAB+ module to bare metal in your vehicle - the car's metal body serves as grounding for stronger signal reception
- Position for best reception: Antenna works best with clear sky view
- Download app: Download a DAB+ app from the Google Play Store to start streaming digital radio
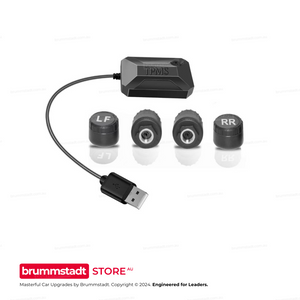
TPMS (Tyre Pressure Monitoring System)
External TPMS Installation (Valve Cap Type):
- Install sensors:
- Remove existing valve caps
- Screw on TPMS sensor caps (hand-tight only)
- Note each sensor's ID number for position mapping
- No tyre removal required - 5 minute installation!
- Connect USB receiver: Plug into available USB port on head unit
- Configure in app: Download and open one of these recommended apps:
- TPMS by Vietmap: Simple interface, good for basic monitoring
- USB TPMS: Advanced features with logging
- Tyre Pressure Monitor: Clean UI with customizable alerts
- Map sensors: Assign each sensor ID to correct wheel position (FL, FR, RL, RR)
- Set alerts: Configure pressure (typically 32-35 PSI) and temperature warnings
Internal TPMS Installation (Professional):
- Tyre removal required:
- Remove wheels from vehicle
- Dismount tyres from rims
- Install internal TPMS sensors on valve stems
- Remount and balance tyres
- Professional installation recommended ($50-100 typical cost)
- Connect USB receiver: Same as external - plug into USB port
- App configuration: Same apps work for both internal and external sensors
- Advantages: More accurate readings, theft-proof, no risk of damage at car wash
After Installation: Drive for 5-10 minutes to activate sensors. You'll see real-time pressure, temperature, and leak alerts directly on your head unit screen!
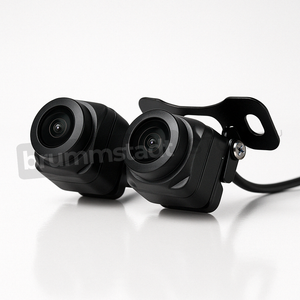
Front and Rear Camera Combo (Live View)
Dual Camera Installation:
- Front Camera:
- Mount behind rearview mirror area
- Connect to dedicated front camera input on head unit
- Route cable along windscreen edge and A-pillar
- Rear Camera:
- Mount above license plate
- Connect yellow RCA to rear CAM-IN
- Connect red wire to reverse light for auto-switching
- Configure in Settings:
- Set both cameras in Factory Settings
- Enable split-screen view option
- Configure switching behavior
Benefits: View both cameras simultaneously, switch between them while driving, perfect for towing or tight parking.
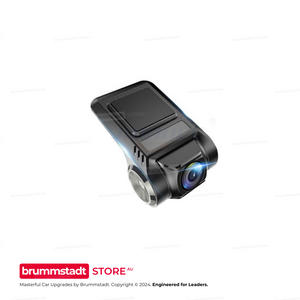
Dashcam (Front Recording)
Installation Process:
- Mount the camera: Position behind rearview mirror for best view
- Clean windscreen thoroughly
- Attach using provided 3M adhesive mount
- Ensure camera has clear view of road
- Connect power: Plug USB cable into head unit's USB port (any available port)
- Route cable: Tuck cable along windscreen edge and A-pillar trim to hide it
- Configure recording:
- Open dashcam app on head unit
- Set video quality (1080p recommended)
- Enable loop recording (overwrites old footage)
- Set G-sensor sensitivity for incident detection
- Storage: Records to the unit's internal storage (choose 4GB/64GB+ for longer recordings)
Features: Continuous recording, automatic incident saving, parking surveillance mode when hardwired to constant power.
Professional Installation Service
- Complete head unit installation by certified technician
- All accessories setup (cameras, microphone, DAB+, TPMS if ordered)
- Professional cable management - all wires hidden
- System configuration and testing
- Tutorial on using all features
- Warranty remains fully valid
Installation Options:
You bring your vehicle to one of our certified installers. Installation typically takes 2-3 hours. Available in major cities across Australia.
• Gold Coast/Brisbane Area
• Launceston Area
Our mobile technician comes to your home or workplace. Same professional quality, maximum convenience.
Booking: After purchase, we'll contact you within 24 hours to schedule your installation at a convenient time.
RAM & Storage Options - Which to Choose?
Quick heads up: The 2/32GB, 4/64GB or 8/128GB refers to the unit's built-in storage (like your phone's memory). This is permanent internal storage that can't be upgraded later.
Which option suits you best?
• Basic CarPlay/Android Auto use only
• Warning: May experience app refreshes or stuttering when multitasking
• OK if you only use one app at a time
• No 4G/SIM support at this level
• Double the power - smooth multitasking
• Run maps and music together without stutter
• Includes 4G LTE & SIM card support
• Room for apps and offline content
• This is what most customers choose
• Power users and businesses
• Run many apps simultaneously
• Best for dashcam recording
• Massive storage for offline maps
• Future-proof choice
💡 Pro Tip: The 2/32GB is really just an entry option. For proper multitasking without frustration, 4/64GB is the sweet spot!
Place your order today and expect your parcel to arrive between Tuesday, 28 October and Tuesday, 4 November. Remote area deliveries might take just a little longer.
Historical Evolution of Toyota Hilux:
First Generation (1968–1972):
Toyota’s first Hilux debuted as a practical and sturdy pickup truck, targeted towards buyers in need of resilient utility paired with affordable ownership. Compact and reliable, it won immediate favour amongst commercial businesses and individual consumers seeking simplicity combined with robust practicality. Although modestly appointed, the original Hilux set high expectations for future generations through its sheer capability.
Second and Third Generations (1972–1983):
Throughout the 1970s and early 1980s, Toyota refined the Hilux, enhancing its mechanical robustness, expanding powertrain options, and gradually improving passenger comfort. These models became acclaimed for unquestionable durability and ease of maintenance, qualities that established widespread popularity worldwide, particularly in expanding markets across Asia, Africa, Europe, and the Middle East. With each iteration, Hilux grew more accommodating without sacrificing its commercial-oriented ruggedness, cultivating an enduring loyalty among drivers seeking reliability above all else.
Fourth Generation (1983–1988) and Fifth Generation (1988–1997):
During the 1980s and 1990s, Hilux transitioned significantly into a more versatile vehicle offering expanded design choices and improved ride comfort. The addition of more powerful engines, including diesel options known for significant torque and fuel efficiency, further expanded the vehicle's already substantial global appeal. This era notably solidified the model’s presence in demanding working environments, including construction sites and agriculture operations, alongside recreational off-road usage.
Sixth Generation (1997–2004):
In response to evolving consumer demands during the late 1990s into early 2000s, the Hilux began placing greater emphasis on interior quality, driving dynamics, and aesthetic refinement. The sixth generation featured significant redesigns that conveniently balanced practical utilitarian functionality with more comfortable daily usability—a balance broadly appreciated by individual drivers, tradespeople, and fleet customers alike. Its continued offering of economical and powerful diesel engine options especially resonated with international markets, underpinning its already strong reputation.
Seventh Generation (2005–2014):
The 2005 introduction of the seventh-generation Hilux, designated as Hilux AN10, AN20, AN30 (depending on cab-type and drivetrain), marked a profound advancement in design, capability, and cabin sophistication. This generation became the global benchmark, often referred to colloquially as the "Hilux Vigo" in significant regional markets, such as Australia, Southeast Asia, Europe, and Africa. Distinguished by a contemporary and muscular exterior, the seventh-gen Hilux featured increased dimensions, considerably more refined cabin design, and advanced safety assessments. Its robust chassis reinforced this iteration’s credentials as a formidable off-road performer and durable commercial vehicle.
The seventh-generation Hilux included multiple powerful engine choices, most notably the revered D4-D diesel variants, widely praised for their elasticity, towing confidence, fuel efficiency, and extensive reliability under rigorous conditions. Advanced suspension geometry adjustments enhanced ride comfort on paved roads, while maintaining its legendary off-road and towing resilience. Collectively, these substantial mechanical and qualitative improvements established the Hilux as both a durable workhorse and a dependable everyday vehicle respected worldwide.
Technology Integration and Aftermarket Enhancements:
Given the considerable lifespan of the model, many seventh-generation Hilux models now benefit significantly from targeted technological updates. Owners aiming to modernize their driving experience frequently seek feature-rich aftermarket infotainment systems designed specifically to complement the Hilux's cabin and harness modern smartphone connectivity.
Brummstadt offers an ideal premium head unit compatible with 2005–2014 Toyota Hilux models, thoughtfully engineered to integrate naturally with the vehicle’s existing dashboard. With wired and wireless compatibility for Apple CarPlay and Android Auto, the system effectively leverages familiar smartphone interfaces—transforming commutes, entertainment, navigation, and driver-focused functionality.
Imagine an evening spent enjoying a pleasant dinner with friends and family, after which the next destination has already been set through mobile device mapping software. Upon starting the vehicle, the route instantly and automatically mirrors on the head unit display via CarPlay or Android Auto. This simple, smooth interaction effectively eliminates stresses related to manual input, traffic unfamiliarity, or post-meal distractions, immediately summarizing the convenience value of such intelligent upgrades.
Further advancing safety, an optional upgrade introduces high-definition 1080p front and rear recording cameras, adding increased visibility, situational awareness, and valuable recorded evidence in event scenarios. Beyond essential automotive functions, Brummstadt’s system even embraces recreational possibilities. USB-connected controllers allow the head unit screen to become a multiplayer gaming hub, especially valuable over long-distance trips—transforming journeys into delightful family interactions.
Moreover, the intelligent voice-control functionality integrated into the Brummstadt unit further heightens convenience by managing media playback, navigation queries, and communication intuitively—in a hands-free operation ideal for traffic safety. Additionally, this voice activation connects seamlessly to smart home ecosystems. A thoughtful illustration: drivers returning home at night announce, "Hey Siri, turn on the porch lights", further integrating driving experiences with modern digital lifestyle convenience.
Hilux 2005–2014 Driving Experience:
Selecting this Hilux generation, drivers accessed remarkable strength, reliability, comfortable driving ergonomics, adaptable bed configurations, impressive payload capabilities, and consistent ruggedness over uneven terrains. With proven reliability, manageable running costs, versatile axle configurations, and desirable diesel engine options, this particular Hilux forged an unparalleled reputation, becoming synonymous worldwide with vehicle dependability and adaptability.
Expand the vehicle's convenience and enjoyment potential through relevant infotainment upgrades like Brummstadt’s premium head unit, genuinely improving day-to-day usefulness, navigation accuracy, safety oversight, and journey enjoyment for the modern Hilux driver.
The seventh-generation Toyota Hilux thus represents a revered milestone within a long-standing legacy of quality and capability. Thoughtful aftermarket advancements in digital connectivity, multimedia functionalities, driver-assistance systems, and contemporary technological convenience suitably enrich driving interactions. Coupled together, the blend of historically validated mechanical ruggedness from this era with targeted digital modernization provides drivers lasting automotive value, dependable practicality, and reliably memorable ownership experiences.
“A car is not just a tool — it’s an experience waiting to happen.”
– Ken Block, World-renowned rally driver and viral motorsport icon
Related Products
Bundle components available separately:


Discover More
Browse our curated selection of related products tailored to complement your purchase:


Frequently Asked Questions
Everything you need to know about this head unit
Connect the single RCA cable with the yellow plug (included in your package) to extend your Bluetooth signal. This cable doubles as both a camera input AND a Bluetooth/WiFi antenna extension. The two small blue wires attached are antenna boosters that significantly improve connection stability. This simple connection takes 30 seconds and resolves 90% of Bluetooth issues. Make sure it's firmly connected even if you're not using a rear camera.
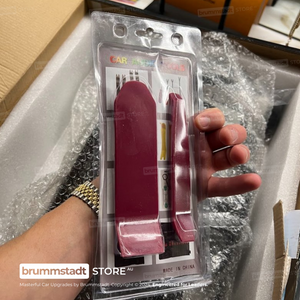
Try these proven solutions:
1. Quick Fix: Settings → Apps → Z-Link → Disable → Enable → Open (repeat each use)
2. Check Cables: Use the data/charge USB cable (not charge-only)
3. Bluetooth Setting: Disconnect all other Bluetooth connections - CarPlay needs exclusive access
4. Factory Reset Z-Link: Find the pink 'RESET' app, restart, reconnect Bluetooth, then try Z-Link
5. Sound Issues: Switch audio source to 'AUX' or 'USB/AUX' in your vehicle menu
Most issues are resolved with step 1 or 3!
The processor differs between models: The 2/32GB has a 4-Core processor, while 4/64GB and 8/128GB models feature the powerful 8-Core Cortex-A55 processor. Combined with RAM differences: The 2/32GB model with its 4-Core processor and limited RAM may experience slowdowns with heavy multitasking. The 4/64GB with 8-Core provides smooth performance for most users - no lag, seamless app switching, and enough storage for maps and music. The 8/128GB with 8-Core offers maximum performance with its generous RAM allowing unlimited multitasking and massive storage for extensive media libraries. Think of RAM like your desk space - more RAM means you can have more apps open simultaneously without slowing down.
Absolutely normal! These head units are complete replacement systems with their own GPS antenna, microphone, and Bluetooth module. Your factory connectors for these features won't be needed anymore. The important connections are: main power harness, speaker outputs, and the yellow RCA cable (even if not using a camera - it extends Bluetooth range). Any leftover factory plugs can be safely tucked away. If you're unsure about any connection, our support team is here 7 days a week.
Z-Link updates are handled through system firmware updates. Go to Settings → System → System Update. If an update is available, download it to a USB drive (FAT32 format) and install. Important: Never download Z-Link APKs from unofficial sources - they won't work and may cause issues. If you're having compatibility issues with newer iOS versions, the disable/enable workaround (Settings → Apps → Z-Link) usually resolves them while waiting for official updates.
Consider your usage:
• 2/32GB (4-Core): Budget option - fine for basic use, but may lag with multiple apps due to 4-Core processor and limited RAM
• 4/64GB (8-Core): Sweet spot - smooth Android Auto/CarPlay, multitasking, and ample storage
• 8/128GB (8-Core): Premium choice - unlimited multitasking, massive storage, future-proof for years
Most customers choose 4/64GB for the perfect balance of performance and value. The extra RAM makes a huge difference in daily smoothness!
The yellow RCA cable's blue antenna wires also boost WiFi signal! Make sure this cable is connected. Additionally, try these tips: Position the blue antenna wires away from metal surfaces, check that your phone's hotspot is set to 2.4GHz (not 5GHz) for better range, and ensure the head unit's WiFi sleep policy is set to 'Never' in Settings → WiFi → Advanced. For best performance with wireless CarPlay, keep your phone within 1-2 meters of the head unit.
Go to Settings → Sound → Equalizer and adjust to your preference. For more volume, increase the 'Loudness' setting. The 4/64GB and 8/128GB models have superior audio chips that provide cleaner, louder sound. If you have an amplifier, use the RCA outputs for best quality. Also check Settings → Factory Settings (password usually 126) → Audio settings for additional gain controls. Remember: higher-spec models (4GB+) include premium audio components for noticeably better sound.
Yes! Most vehicles work instantly. If not, use the steering wheel learning app: tap the steering wheel icon, press each button on your wheel, and assign functions. For newer vehicles with CANbus, we provide CANbus modules for automatic setup. Some vehicles may need the Key1/Key2 wires connected (usually included in our harness). If you're having trouble, let us know your exact vehicle model and we'll provide specific instructions.
We offer a 30-day return policy. If it doesn't fit or there's a compatibility issue, we'll work with you to resolve it. If you change your mind, a 20% restocking fee applies. Our team verifies compatibility before shipping to minimize issues. We provide installation support 7 days a week to help resolve any problems. With our 3-year warranty and Australian-based support, you can purchase with confidence. Full details in our Refund Policy.
Historical Evolution of Toyota Hilux:
First Generation (1968–1972):
Toyota’s first Hilux debuted as a practical and sturdy pickup truck, targeted towards buyers in need of resilient utility paired with affordable ownership. Compact and reliable, it won immediate favour amongst commercial businesses and individual consumers seeking simplicity combined with robust practicality. Although modestly appointed, the original Hilux set high expectations for future generations through its sheer capability.
Second and Third Generations (1972–1983):
Throughout the 1970s and early 1980s, Toyota refined the Hilux, enhancing its mechanical robustness, expanding powertrain options, and gradually improving passenger comfort. These models became acclaimed for unquestionable durability and ease of maintenance, qualities that established widespread popularity worldwide, particularly in expanding markets across Asia, Africa, Europe, and the Middle East. With each iteration, Hilux grew more accommodating without sacrificing its commercial-oriented ruggedness, cultivating an enduring loyalty among drivers seeking reliability above all else.
Fourth Generation (1983–1988) and Fifth Generation (1988–1997):
During the 1980s and 1990s, Hilux transitioned significantly into a more versatile vehicle offering expanded design choices and improved ride comfort. The addition of more powerful engines, including diesel options known for significant torque and fuel efficiency, further expanded the vehicle's already substantial global appeal. This era notably solidified the model’s presence in demanding working environments, including construction sites and agriculture operations, alongside recreational off-road usage.
Sixth Generation (1997–2004):
In response to evolving consumer demands during the late 1990s into early 2000s, the Hilux began placing greater emphasis on interior quality, driving dynamics, and aesthetic refinement. The sixth generation featured significant redesigns that conveniently balanced practical utilitarian functionality with more comfortable daily usability—a balance broadly appreciated by individual drivers, tradespeople, and fleet customers alike. Its continued offering of economical and powerful diesel engine options especially resonated with international markets, underpinning its already strong reputation.
Seventh Generation (2005–2014):
The 2005 introduction of the seventh-generation Hilux, designated as Hilux AN10, AN20, AN30 (depending on cab-type and drivetrain), marked a profound advancement in design, capability, and cabin sophistication. This generation became the global benchmark, often referred to colloquially as the "Hilux Vigo" in significant regional markets, such as Australia, Southeast Asia, Europe, and Africa. Distinguished by a contemporary and muscular exterior, the seventh-gen Hilux featured increased dimensions, considerably more refined cabin design, and advanced safety assessments. Its robust chassis reinforced this iteration’s credentials as a formidable off-road performer and durable commercial vehicle.
The seventh-generation Hilux included multiple powerful engine choices, most notably the revered D4-D diesel variants, widely praised for their elasticity, towing confidence, fuel efficiency, and extensive reliability under rigorous conditions. Advanced suspension geometry adjustments enhanced ride comfort on paved roads, while maintaining its legendary off-road and towing resilience. Collectively, these substantial mechanical and qualitative improvements established the Hilux as both a durable workhorse and a dependable everyday vehicle respected worldwide.
Technology Integration and Aftermarket Enhancements:
Given the considerable lifespan of the model, many seventh-generation Hilux models now benefit significantly from targeted technological updates. Owners aiming to modernize their driving experience frequently seek feature-rich aftermarket infotainment systems designed specifically to complement the Hilux's cabin and harness modern smartphone connectivity.
Brummstadt offers an ideal premium head unit compatible with 2005–2014 Toyota Hilux models, thoughtfully engineered to integrate naturally with the vehicle’s existing dashboard. With wired and wireless compatibility for Apple CarPlay and Android Auto, the system effectively leverages familiar smartphone interfaces—transforming commutes, entertainment, navigation, and driver-focused functionality.
Imagine an evening spent enjoying a pleasant dinner with friends and family, after which the next destination has already been set through mobile device mapping software. Upon starting the vehicle, the route instantly and automatically mirrors on the head unit display via CarPlay or Android Auto. This simple, smooth interaction effectively eliminates stresses related to manual input, traffic unfamiliarity, or post-meal distractions, immediately summarizing the convenience value of such intelligent upgrades.
Further advancing safety, an optional upgrade introduces high-definition 1080p front and rear recording cameras, adding increased visibility, situational awareness, and valuable recorded evidence in event scenarios. Beyond essential automotive functions, Brummstadt’s system even embraces recreational possibilities. USB-connected controllers allow the head unit screen to become a multiplayer gaming hub, especially valuable over long-distance trips—transforming journeys into delightful family interactions.
Moreover, the intelligent voice-control functionality integrated into the Brummstadt unit further heightens convenience by managing media playback, navigation queries, and communication intuitively—in a hands-free operation ideal for traffic safety. Additionally, this voice activation connects seamlessly to smart home ecosystems. A thoughtful illustration: drivers returning home at night announce, "Hey Siri, turn on the porch lights", further integrating driving experiences with modern digital lifestyle convenience.
Hilux 2005–2014 Driving Experience:
Selecting this Hilux generation, drivers accessed remarkable strength, reliability, comfortable driving ergonomics, adaptable bed configurations, impressive payload capabilities, and consistent ruggedness over uneven terrains. With proven reliability, manageable running costs, versatile axle configurations, and desirable diesel engine options, this particular Hilux forged an unparalleled reputation, becoming synonymous worldwide with vehicle dependability and adaptability.
Expand the vehicle's convenience and enjoyment potential through relevant infotainment upgrades like Brummstadt’s premium head unit, genuinely improving day-to-day usefulness, navigation accuracy, safety oversight, and journey enjoyment for the modern Hilux driver.
The seventh-generation Toyota Hilux thus represents a revered milestone within a long-standing legacy of quality and capability. Thoughtful aftermarket advancements in digital connectivity, multimedia functionalities, driver-assistance systems, and contemporary technological convenience suitably enrich driving interactions. Coupled together, the blend of historically validated mechanical ruggedness from this era with targeted digital modernization provides drivers lasting automotive value, dependable practicality, and reliably memorable ownership experiences.
